Archive for 2013


How to Keep Your Snow Blower Chute from Clogging

Friday, January 18th, 2013

How to Keep Your Snow Blower Chute from Clogging - Snow Removal

Snow blowers are a wonderful invention. They make short work of clearing driveways and sidewalks after an overnight snow. Just imagine a winter without shoveling – no more back injuries, aching muscles,, or falls on icy surfaces!

After the record-breaking snowfall last winter, you finally decided to buy a snow blower. Even though you never complained about shoveling snow, you were mentally turning cartwheels when you brought your new snow blower home. However, you have noticed your snow blower has started to vibrate and snow is not discharging from the chute as it should. You can fix the problem yourself – if you know how to keep your snow blower from clogging.

How to Keep Your Snow Blower Chute From Clogging

First, you need to understand the basic mechanics of your snow blower. The parts of the machine that do the biggest job are the impeller paddles (in single-stage machines) or a combination of an impeller and auger blades (in two-stage snow blowers). These key parts pull the snow into the machine and force it out through the chute.

Use these tips to prevent and fix snow blower clogs:

– Keep the snow blower path clear of potential obstructions like rocks, toys, and other small objects.

– One of the main problems can be heavy, slushy snow. Wet snow becomes compacted and forms ice chunks, which will clog the chute. Use a clean-out tool or stick to remove the ice or other obstruction. Always turn the snow blower off and disconnect the spark plugs before attempting this – NEVER use your hand to dislodge obstructions.

– Let the engine warm up before clearing snow. Start by clearing a patch of light snow and then move into deeper areas.

– Direct the snow blower slowly through the snow. Do not force it. Allow the machine to propel itself forward at a steady pace.

– The internal surfaces of the snow blower can become pitted and rough after a season or two of use. Make sure all parts are completely smooth. Coat the impeller/auger and chute with graphite spray. This will prevent snow from sticking to internal surfaces.

Buying a new Snow Blower

If you are in need of a new snow blower, the first thing to consider is if you need a single-stage or two stage-blower. Single stage blowers are meant to handle lighter amounts of snow whereas a two-stage blower have have an auger that feeds the snow into two mechanisms, one that feeds it in and other that throws it out. Several other factors can determine the type of blower you need including: size of your driveway, how often it snows in your location, and your budget. You can compare snow blowers at Amazon to find the one that is best suited for you.

Professional Help

Now you know how to keep your snow blower from clogging, right? If you have tried all of these tips and your snow blower continues to clog, it might be time to take it in for repairs and maintenance. Let your friends at TalkLocal put you in touch with a mechanic that specializes in snow blowers. This way, you can spend more time sledding and building snowmen with the family!

What are the Best Deadbolts?

Friday, January 18th, 2013

What are the Best Deadbolts? - Locksmiths

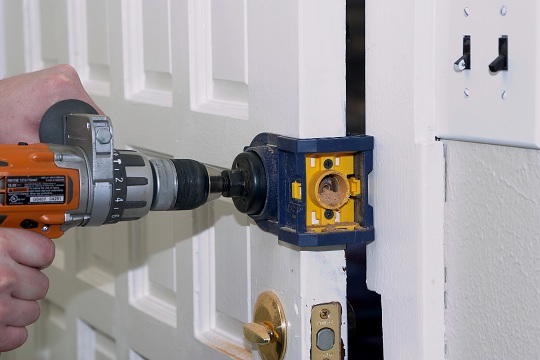
Nothing is more important than feeling secure and safe within the comfort of your own home. As homeowners, there are many steps you can take to protect your belongings and important possessions. When thinking about improving your home security, it is important to know what the best deadbolts are for securing the doors to your house. The investment of a good deadbolt can make your doors more resistant to entry. So what are the best deadbolts?

Choosing the Best Deadbolts

It is important to look for quality when picking out deadbolt locks for your doors. The doors to your home should have Grade 1 deadbolt lock for maximum security. In addition, the deadbolts should be single cylinders to allow easy exit access from the inside, but have a strong lock from the outside.

Knowing which is the right kind of deadbolt for the security of your home can be difficult. A determined burglar with the wrong intentions will be able to force their entry into one’s home. With this in mind, it is important to talk with a professional to help seek out the best locks and security systems for your home.

Additional Help

Instead of searching online for hours to find a local professional, use TalkLocal and let us find a service professional who meets your specific needs. With TalkLocal, you can reach a locksmith in minutes to help you find the right deadbolt and lock for you. TalkLocal is great for finding local professionals to help you with your problem. Fill out a service request online and get started today!

Best Bait to Use for Mouse Traps

Thursday, January 17th, 2013

Best Bait to Use for Mouse Traps - Pest Control

Do you have a mouse problem? In one way or another, those annoying critters have to go – not only do they pose a health threat because they leave their droppings everywhere, but they also chew away at your furniture/house installments, devaluing your house and further putting you in danger.

The Bait Mechanics

The most effective mouse traps use some form of bait. The main point of the bait is for the mouse to take (eat) the bait, thereby triggering the trap – all of which ends in a trapped, and possibly dead, mouse to be disposed of.

The problem that many homeowners face is that it’s often hard attracting the mouse to a particular bait – a block of cheese placed on the trap isn’t any more appealing than a slice of pizza laid on the counter/in the garbage can.

Another problem is that the type of bait placed on the trap isn’t bulky enough for the trap to be triggered while the mouse happily eats away – mice will gently lick away at the bait without moving the bait enough for the trap to trigger.

If the mouse isn’t taking the bait (the type of food is not attractive enough), try some of the baits that have been known to get good results: peanut butter, bacon, meat, etc. You should get rid of the other options for food for the mice (laid out pizza, pies, etc) so that they have no real alternatives for food source besides your bait.

If the tackled bait isn’t triggering the trap, the problem is that the bait is often too fluid (runny, soft, etc) so that it does not make an impact large enough for the trigger to work.

Try a bulky, heavy bait that is attractive to the mice – get a chunky peanut butter instead of the “smooth spread” brands. Try adding bits of bacon to the peanut butter to make it chunkier. The mouse might still try licking off the peanut butter, but the trap will trigger when it licks the bacon as well while licking the peanut butter.

Additional Help

If you feel like you need professional help on catching these annoying critters or any advice on the best bait to use for mouse traps, TalkLocal can connect you with up to three local professionals in just minutes! Use TalkLocal and let us do the searching for you.

What You Need to Know about Prenatal Massage

Thursday, January 17th, 2013

What You Need to Know about Prenatal Massage - Massage Therapists

Congratulations! You’re having a baby after nine months filled with joy and anticipation of the new arrival. However, pregnancy can also add stress to your body resulting in unfamiliar aches and pains. Consider prenatal massage therapy as a sensible way to relieve your discomfort.

Prenatal massage works to loosen your muscles, lessen joint pain, relieve swelling and improve blood flow. If you’ve ever had a professional massage, you know how much better you feel after a single session.

Before you rush to make an appointment, you should be aware of its advantages and disadvantages. Read on to find out what you need to know about prenatal massage.

Benefits of Prenatal Massage

Massage therapy is regarded as a healthful treatment for pregnant women. Regular prenatal massages can relieve minor issues associated with pregnancy, such as painful joints, headaches, sinus congestion, swollen hands and feet, insomnia, neck pain, leg cramping and sciatica. Get approval from your obstetrician before going forward with prenatal massages. If you have a history of high-risk pregnancies, premature labor, diabetes, severe morning sickness, high blood pressure or periods of abdominal pain and bleeding, you may not be a good candidate.

When you get your doctor’s go-ahead, remember not to start the sessions too early. Most certified therapists refuse to provide services to women in their first trimester due to miscarriage risks. Be prudent and wait until you are in your second trimester before undergoing your first treatment.

Factors to Consider Before and During Prenatal Massage

Do not assume your regular therapist can do prenatal massages. You must choose a massage therapist who is certified to perform prenatal massages. If you are still uncertain about your choice, ask for a list of patient references and check each one.

As cheap and convenient as it may seem, do not allow your friend or partner to give you a massage. While there are thousands of online instructional guides on prenatal massage, the techniques should only be performed by a trained professional. Certified prenatal massage therapists recommend side-lying treatments. There are specially designed prenatal massage tables for stomach-down treatments, however they may not provide the proper abdominal support for your body type. Additionally, be wary if a therapist insists on positioning you on your back. This could put undue stress on the placenta and greatly reduce blood circulation.

Finally, if a particular manipulation is painful, tell the therapist immediately. Prenatal massage should be a comfortable, relaxing experience. Discomfort and pain will cause your muscles to tense up, which defeats the purpose of the treatment.

Additional Help

Proper prenatal massage techniques will go a long way in improving your health and comfort levels during pregnancy. By now, you have learned what you need to know about prenatal massages. If you are ready to find a certified prenatal massage therapist, let TalkLocal help you! TalkLocal will connect you with up to three prenatal massage therapists in your area who are available when you need them.

Relieve Tooth Extraction Pain

Thursday, January 17th, 2013

Relieve Tooth Extraction Pain - Dentists

Relieve Tooth Extraction Pain

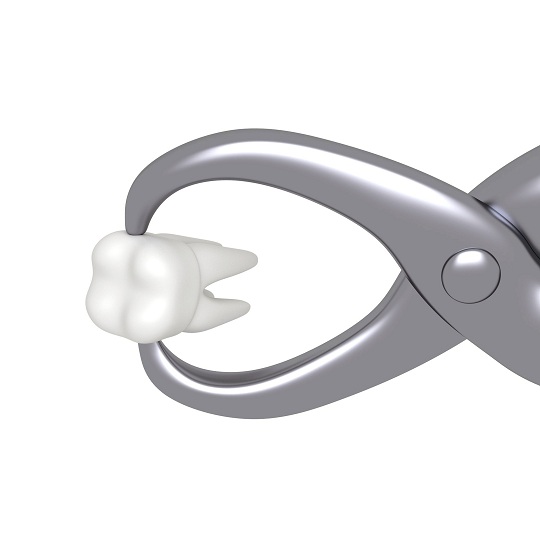
Are you having pain issues following a tooth extraction? Your doctor likely prescribed you something after the extraction to ease the pain. However, if you find that these medications are not helping you deal with the pain, it is best to talk to your doctor directly about the problem (since the doctor knows exactly what kind of procedure you had done). You can also take steps to ensure that the healing process goes well.

How to Ensure Smooth Healing

After the dentist dislodges the tooth forcefully, your body is going to bleed no matter what – and since the breach in the blood vessels (the place in which the tooth used to be) is concave (as in, caved in), the blood clot is going to form in the concavity of the gum. It is best to not upset this clot – when you dislodge the clot a new one has to form, altering and hindering the natural healing process.

So take care to avoid dislodging/upsetting the naturally forming clot in any way. It’s also a good idea to sleep, since the body heals fastest when it is not using excess energy – also limited movement while sleeping helps against dislodging the clot.

Avoid any actions that may dislodge a blood clot:

– Smoking

– Spitting excessively

– Operating an oral instrument

– Eating foods that involve a lot of chewing

– Drinking from a straw

Even if the clot gets dislodges or falls out, don’t panic – just let it be. A new clot will form.

Bleeding signifies that blood vessels are open. That means that your body is more susceptible to germs and infections than before. Maintain good hygiene and double check the foods/objects that you are putting inside your mouth in order to prevent infections.

Be gentle when you clean your mouth. Dentists recommend washing the mouth frequently with salt water in order to kill any harmful germs/bacteria within your mouth. However, salt can cause pain when it is applied directly to wounds in excessive amounts.

Additional Help

If you feel like you need professional help with any kind of tooth or oral pain, TalkLocal can connect you with up to three local professionals in just minutes!

Computer Clock Wrong?

Thursday, January 17th, 2013

Computer Clock Wrong - Computer Repair

Have you ever looked down to the bottom right corner of your computer screen and completely freaked out because you thought you had lost track of time? Did you then realize that the computer clock wasn’t displaying the correct time at all?

Why is the Computer Clock Wrong?

How do I fix the problem?

In order to fix the time zone issue you will have to go into the control panel, into date/time settings and correct the issue.  Similarly you can fix the daylight savings problem by going to the same place and making sure that the daylight savings box is checked.  Another way to fix these malfunctions would be to simply right click on the time and manually fix the issue on the clock in the panel that pops up.

The shared network issue can be fixed by putting yourself on your own network or simply changing the settings on the network so that someone else’s adjustments do not affect your own computer.

If the CMOS battery that sits on the motherboard and provides power is drained then your clock could be wrong.  The battery chip stores info including date and time so if it goes bad it will lose all of its data and begin to make the computer malfunction. In this case you will have to order a replacement battery and install it.

If the time program is corrupted then the issue is a little more serious and you should consult a professional.

Who should I call?

In order to get your every computer/IT need met you should use TalkLocal. They can put you in touch with the very best local businesses to help you solve your problems. TalkLocal does all the work for you- just tell them your issue and they can save you time, money, and the headache of finding help.

How Fast Can A Maid Clean?

Thursday, January 17th, 2013

How Fast Can A Maid Clean? - Maid Services

How fast can a maid clean? Professional maids are trained to be thorough and efficient. However, a few factors need to be calculated  in order to estimate how long it will take a professional maid to clean.

Size of the Space

There is a difference between having an apartment cleaned and an entire house cleaned. The size of the area will determine how much time it will take a maid to effectively clean everything. A maid service will likely ask for a square-footage estimate of the area to be cleaned, as well as details about any furniture in the area.

How dirty is the area?

The time needed to clean up depends on how soiled the area is. If the space is cleaned regularly once per week, then the maid only needs to touch up. If the space has not been cleaned in at least two weeks, it will take more time to clean in order to ensure the space is dust- and dirt-free. In addition, the maid’s responsibilities will also determine how long she takes. Some maids dust, mop, wash dishes, launder clothes, iron, and vacuum. The type of cleaning you want done will decide how much time the maid needs to clean.

Size of the Cleaning Crew

If there is one maid it will take longer to clean than if there were multiple maids. Again, the size of the cleaning crew will depend on the size of the space that needs to be cleaned, as well as the service you request.

To find the best maid services near you, contact TalkLocal. TalkLocal is a search engine for services that connects consumers with quality local companies over the phone in minutes. Try us now!

Are Snow Tires Necessary?

Wednesday, January 16th, 2013

Are Snow Tires Necessary? - Snow Removal?

The snowy drive home today was a white-knuckler. Your car fishtailed, spun out, skidded and almost slid into another vehicle. That harrowing experience has you thinking seriously about buying snow tires. However, the sheer expense of new tires has you asking, “Are snow tires necessary?”

Benefits of Snow Tires

Snow tires feature specialized treads designed to grip into snow, giving you more control on slick or snow-packed roads. They are made from rubber compounds that remain pliable in cold weather, allowing them to conform to rapidly changing winter road surfaces.

Factors to Consider

If you are grappling with the decision of whether or not to buy snow tires this winter, the determining factors involve where you live, the route of your daily commute and, of course, weather conditions.

If you live in the city, you are probably fine with all-season tires as long as they have sufficient tread. You are even better equipped if you have a front-wheel or all-wheel drive vehicle with anti-lock brakes. In most metropolitan areas, snow is plowed and roads are de-iced or salted as conditions warrant. Un-plowed side streets may pose a bit of a problem, but all-season tires should be sufficient for driving to and from school or the neighborhood market.

If your daily route takes you outside city environments, you should consider snow tires. This is especially true if you regularly encounter snowy back roads and less-traveled highways with accumulations of slush and ice. Snow tires will provide better handling and maneuverability than all-season tires.

Obviously, if you live in a rural area that receives regular snowfall, snow tires are an absolute necessity. On mountainous terrain, you may be required by law to use snow tires and chains.

If you do opt for snow tires now, you need to switch to all-season tires once the temperature exceeds 45 degrees Fahrenheit. Otherwise, the treads will wear down quickly on warm, snow-free pavement.

Additional Help

You may still be wondering, “Are snow tires necessary?” TalkLocal can help you locate reputable dealers in your area who can help you decide. You will then have the confidence to hit the road all winter long!


Tips for Preparing Personal Budget

Wednesday, January 16th, 2013

Tips for Preparing Personal Budget - Accountants

Preparing personal budget information is not terribly exciting or fun. In fact, it can be downright depressing when you begin to delve into your monthly spending habits. However, if you are financially strapped and want to save money, a budget is the only way to go.

Creating a budget is easy. You simply need to keep detailed records of the money you spend and earn on a monthly basis. Your budget will highlight areas of unnecessary spending, so you can cut back on things you don’t need.

The following steps will put you on the path to financial stability:

1. Make note of every source of income. You may have two jobs and your spouse another. Document the net amount from your paycheck(s). If you have a job where your monthly income varies – whether from waiting tables, freelance work, or commission – take a monthly average based on your previous year’s income after taxes.

2. List your monthly expenses. Write down each expense that occurs on a monthly basis (in other words, everything you purchase and every bill you pay). Your checkbook register is a good place to find this information (click here to learn how to balance a checkbook).

3. Divide your expenses into fixed and variable. Take your master list of expenses and break each item down into the ones that remain relatively constant and those that vary from month to month. Fixed expenses include items like rent, car payment, cable, Internet, and trash service. Variable expenses will be things like gasoline, groceries, clothing, and pet care.

4. Come up with separate totals for monthly income and monthly expenses. If your expenses equal or exceed your income, you are in serious need of budgetary adjustments.

5. Reduce your expenses. If you feel confident that your list of monthly expenses is accurate, your first order of business is to cut unnecessary spending. Start by reducing expenditures on non-essential items like eating out, dry cleaning, and gifts. Even small changes like this will bring you closer in line with your income.

6. Revisit your budget every month. You may need to make slight adjustments to your budget throughout the year. For instance, you may have failed to allocate enough for groceries. Increase your grocery budget by reducing another variable expense such as entertainment.

Creating objectives and staying on a budget may be painful at times, but you should always keep your long-term financial success in mind. Whether your plan is to pay off credit card debt or create a comfortable nest egg, never lose sight of your goals!

If you are still struggling with your budget, check out TalkLocal – this free service will connect you with up to three accountants in your area who specialize in personal finance. You will be connected in minutes with a local professional who is available when you are.

How to Balance a Motorcycle Wheel

Wednesday, January 16th, 2013

How to Balance a Motorcycle Wheel - Auto Repair

If you want to learn how to balance a motorcycle wheel, this article will show you how.

To balance a motorcycle wheel, you will need:

– two sawhorses/folding stools

– lubricant

– a tire iron

– a marking pen

– tape

– two-sided foam rubber glue

– weights

1. Search the wheel of your motorcycle for a flat spot.

2. After you have found it, put your two sawhorses or folding stools back to back along the flat spot, the length of your motorcycle’s axle.

3. Apply lubricant to the weights of the wheels of your motorcycle.

4. After the weights are thoroughly lubricated, you be able to take them off.

5. Clean the grease on the surface of your motorcycle’s wheel.

6. Place the axle in the wheel, using the sawhorses or folding stools you set up to support it.

7. Level the wheel of your motorcycle and use your marking pen to mark the bottom of it.

8. Turn the wheel until the heavy side of the axle in on the bottom of the wheel.

9. Turn the wheel 180 degrees.

10. Take a small weight and tape it to the mark you made on the bottom of the wheel. Continue to turn the wheel, checking that it is balanced in every possible position of the wheel.

11. After you are sure your motorcycle’s wheel is balanced, use your two-sided foam rubber glue to attach the weights the wheel.

Having troubles balancing your tires?

If you do not wish to balance your motorcycle’s wheel yourself, you can take your motorcycle to an auto repair professional and they will do it for you. With the help of TalkLocal you can be on the phone within minutes with up to three high quality auto repair professionals in your area, that are available when you are. TalkLocal’s service is completely free, so try it out today to save time with your appointment scheduling.