Archive for 2013


Utility Trailer Sizes

Wednesday, July 3rd, 2013

Utility Trailer Sizes - Towing

When you are buying a utility trailer, there are several things to consider. Buying a trailer that is too big or too small can prevent you from hauling the necessary items or even cause damage to your vehicles.

Here are some of the most important things to consider when you are shopping for a utility trailer.

Utility Trailer Sizes

Utility trailers come in a variety of sizes, and each one is rated to carry a specific load amount. Common utility trailer sizes can include widths that range from four to eight feet and lengths of up to 20 feet.

If you plan to haul large or heavy items, you will want to choose a bigger trailer. If you will only be hauling small items, a smaller one is better. Keep in mind that certain vehicles cannot handle large trailers, so when thinking about utility trailer sizes, consider the capabilities of your vehicle.

Sides

If you will be hauling items that are small or could easily fall out of an open or flat utility trailer, you may want to purchase one that has sides.

These trailers are often a little more expensive than ones without sides, but they could help prevent you from losing the items you are hauling.

Ramps

Some types of utility trailers come with ramps attached to them. You will need ramps if you plan to haul vehicles, ATVs, or anything else with wheels.

If you will be hauling heavy items with a dolly onto the trailer, you will also need ramps. Most trailers that come with ramps are also made to store them, so they are out of the way when not in use.

Don’t waste your money by buying a utility trailer without considering how you will use it. Make sure the trailer you buy is large enough for all of your needs, but also small enough that it can be stored snuggly, and pulled by your vehicle.

Need Help Hauling? Use Talk Local

TalkLocal should be the first place you visit when you need to find help towing anything. We can instantly connect you with three qualified and local professionals who can help. The process is fast, and also free.

Are Paint Solvents Harmful?

Wednesday, July 3rd, 2013

Are Paint Solvents Harmful? - Painters

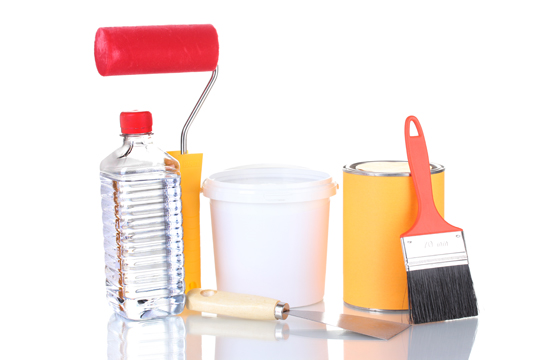
Paint solvents, in their many forms, are used for a variety of reasons and are handy to have around if you do crafts or paint for a living. While solvents are common, they can also be harmful. How are paint solvents harmful? Read on to find out.

Toluene

Toluene is a chemical which is commonly found in paint solvents. It can be very harmful if swallowed or inhaled and is known to cause headaches, nausea, breathing problems, and confusion. It can even cause irritation if it comes into contact with skin.

Ethyl Acetate

Ethyl acetate is another chemical which is found in paint solvents, and if inhaled, can cause many health problems. This chemical can cause burning of the throat, nose, and lungs and can even damage your sinuses. It can also act as a anesthetic if swallowed or inhaled.

Risk To Children

Children are especially at risk to the dangers of paint solvents. If you are wondering ‘are paint solvents harmful?’, consider how easy it would be for a child to be exposed to it.

Many brands of paint solvents do not have child-proof caps and can be easily opened. The chemicals that make up paint solvents can cause life-threatening health problems if ingested, including liver damage, respiratory problems, kidney failure, and chemical burns.

Fire Risk

Many of the chemicals found in paint solvents are extremely flammable and should be considered a fire risk. To avoid this risk, paint solvents should be stored in safe locations, away from heat, flames, and electrical outlets.

If you have ever wondered: How are paint solvents harmful? You are not alone. Many people use paint solvents every day and have no idea that they are handling chemicals which are potentially dangerous.

Always use proper safety precautions when using paint solvents so you do not accidentally inhale or ingest any of them.

Looking For A Painter?

Professional painters are equipped to handle these hazardous chemicals. If you would rather a trained professional take care of your job, use TalkLocal to find one.

We will get three local painters to call you, and you get to choose the best one. You don’t have to ever make endless inquiring phone calls ever again.

Attached Deck Versus Gazebo

Wednesday, July 3rd, 2013

Attached Deck Versus Gazebo - Landscapers

If you are having a hard time choosing between an attached deck versus gazebo, you are not alone. A lot of homeowners and landscapers have the same problem. Both are appealing and can add value to your home or land. It does not come down to which one is the better choice, just which one is the better choice for you. Here is a comparison of both structures that will help you decide which one you might want in your yard.

Attached Deck

– Attached decks are convenient because you can just walk out your door and step onto them.

– They can be built from a variety of different materials.

– Attached decks can be made to fit any home and come in a variety of different shapes and sizes.

– Some attached decks are built at different levels so you can use each section for something different.

– Attached decks are well suited for most types of patio furniture.

– They can have a roof built on top of them or left open.

Gazebo

– Gazebos have a unique design that is eye-catching and creates a certain look in your yard.

– They can be built anywhere on your property and do not have to be close to your home.

– Gazebos are typically made out of wood, and can be stained or painted as desired.

– Gazebos offer shade and can keep you cool on hot days.

– Although they can be expensive, gazebos are very detailed, and can even be custom made to fit your wants and needs.

The attached deck versus gazebo choice can be a tough one, and if you are like most people, it can be hard to make a final decision. Consider the size of your yard, your budget, style, and the needs of your family, and choose the one that is best designed for your yard.

Find Help For Your Project

When it comes time to build either a deck or a gazebo, you will most likely want the help of a qualified professional. Finding one is ultra-easy with TalkLocal. We do all the work so you can get help quicker. You’ll be speaking with a professional in minutes.

How To Use Hem Tape

Wednesday, July 3rd, 2013

How To Use Hem Tape - Tailors

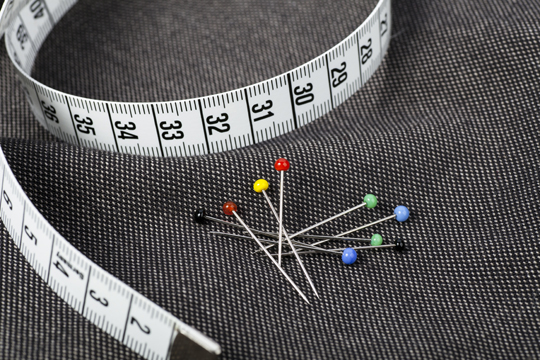
Plenty of designers, tailors, and seamstresses sing the praises of hem tape. And why not? It’s easy to use, lasts for many washings, is flexible, and you can’t prick your finger with it. If you’re not familiar, you might be wondering exactly how to use hem tape. You’ll be relieved to know that it’s simpler than you think.

How To Use Gem Tape

1. Begin by washing your fabric. Even if it’s a large set of curtains, you must wash it — preferably with a scent-free soap. Do not use bleach, fabric softeners, or dryer sheets. Making the fabric as clean and chemical-free as possible will allow the tape to stick better. This is the first and most basic rule of how to use hem tape.

2. Measure the hem you’ll be working on. Cut an appropriate amount of hem tape. This may be easier to do if the garment is turned inside out. For large items like draperies, you may want to work several small segments rather than a whole curtain at once.

3. Before attaching the hem tape to the fabric, iron the desired crease right into the fabric. Follow the usual directions for your iron and for the material. If the material should not be ironed, hem tape is not the way to go. Try needle and thread, or see your tailor.

4. Place the hem tape in the desired location to hold the hem in place. If everything lines up and looks good, peel the backing from the tape. Now, press it into place.  This can be tricky for beginners, so go as slowly as you need to. Cutting the hem tape into smaller pieces can help. Be sure not to overlap, as this will not create a smooth hemline.

5. Iron the crease again, following usual directions. Essentially, the hem tape will melt slightly, causing the fabric to stick together and the hem to hold.

6. Allow the fabric to cool before wearing or hanging. Really. Do not learn this the hard way. Your legs will thank you.

The best way to learn how to use hem tape is to practice. If you want an article of clothing to keep the same hem permanently, you’ll get plenty of practice, since most hem tapes last for about seven washings. Keeping hem-taped items out of hot dryers can lengthen this a little, as can avoiding bleach.

Some hem tapes may also be cleanly removed with an iron. This is great for hand-me-down slacks, or skirts that look great at multiple lengths. Practice a bit with hem tape, and then be amazed at what it can do for your wardrobe.

Need Help Using Hem Tape?

If there is little room for error with a certain outfit, it might be best to visit a qualified tailor. Find a local one quickly and easily through TalkLocal. You won’t have to spend a ton of time looking them up online or paging through the phone book. We’ll connect you to the right professionals within minutes.

Zombie-Proof Your Home: Still Alive?

Wednesday, July 3rd, 2013

Zombie Summer Survival Guide: Still Alive? - Seva Call

Written by Steven D’Adamo

So, it’s the Zombie Apocalypse that movie-goers and comic book readers everywhere have been predicting (hoping for?), and this is probably your last chance to use the Internet for…forever.

I write to you from the steam-punk-esque fortress that is now Seva Call Headquarters, where I and the remaining interns are holding out for a miracle. Good thing the Seva Call snack bar is stocked with twinkies and cup-o’-noodles. Unfortunately, some of the upper management were out on a Chipotle run, and are currently MIA, while Seva Man is lost somewhere in Kentucky. Hopefully he found a horse… and also learned how to ride a horse.

Our make-shift modifications to Fort Seva Call have protected us from the first wave of zombies, and somehow left our internet intact. Also, Zaneta somehow macgyvered a power strip, a ping pong paddle, and a blunted knife into an awesome zombie-killing weapon. Who knew? She always seemed so sweet.

So for anyone who can read this, I’ll be posting as many updates as I can, letting you know how we’re holding up. And since we haven’t been overrun by brain-eaters yet, I think I have some helpful advice for you to zombie-proof your home. Looks like we’re the pest control experts now! Okay, bad pun.

I think I should go now. Matteo is glaring at me. I should probably help with the fortifications.

Check back soon for some updates. Steve out.

Increase Motorcycle MPG

Tuesday, July 2nd, 2013

Increase Motorcycle MPG - Auto Repair

If you own a motorcycle, you probably already know that they get pretty good gas mileage. For many people, this is why they chose to buy a motorcycle in the first place.

Did you know that you can increase motorcycle mpg with a few simple techniques? It’s true, try one of these methods and you could be driving even further on a tank of gas.

Accessories

The accessories and decoration which are hanging on your bike may look good, but they could be hurting your gas mileage. These things can make your bike heavy and cause it to use more gas than necessary.

Remove the items unless they are absolutely necessary or serve a purpose on the bike. You can always add them back at a later time or when your bike is parked and on display. Also, check your tires. Under-inflated tires (maybe you need to change one of them) can contribute to decreased mpg.

Acceleration

Many people are not aware that the way they drive can increase motorcycle mpg. When you drive fast or are quick to accelerate and hit the brakes, you are using more gas than necessary and essentially wasting it.

Slow down and only go as fast as the speed limit or as necessary. If you know you will be stopping, try coasting or barely giving the bike any gas.

Driving In Town

While most people enjoy driving their motorcycle in town, it can use a lot of gas. Starting and stopping uses more gas than if you are driving for longer periods of time between stopping. Avoid rush hour traffic and try to stay away from busy streets.

Face Shield

Little things like wearing a face shield can help increase motorcycle mpg. The face shield helps reduce wind resistance and helps save your gas. Many helmets come with face shields.

All of these techniques are simple, inexpensive, and effective at increasing the gas mileage on your bike. Try one or more of them out and see for yourself.

For Motorcycle Repair…

If you need an auto repair service for your motorcycle, start (and end) your search at TalkLocal. We help you track down, and connect you with, the most qualified professionals in your area. It only takes minutes.

Cost Of A New Washing Machine

Tuesday, July 2nd, 2013

Cost Of A New Washing Machine - Appliances Repair

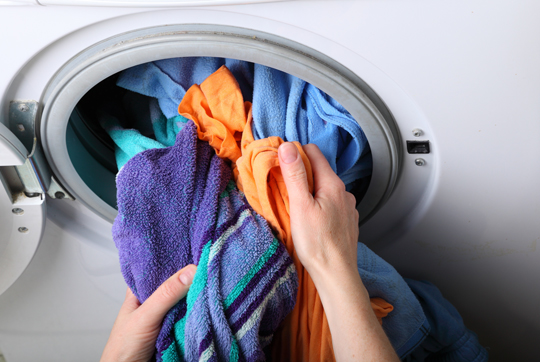
A washing machine is a necessary appliance which most people cannot live without. If you are moving into your first home or need to buy a new washing machine because the other one is not functioning properly, you may be wondering about ways you can reduce the cost of a new washing machine. Washing machines can be expensive and most people are looking to save money any way they can. Here are some tips to help you reduce the cost of your new appliance.

Scratched And Dented Appliances

Many stores have appliances which have been lightly scratched or dented, but are otherwise in good working condition. If you do not mind a little cosmetic damage, you may be able to reduce your cost of a new washing machine dramatically. These appliances are still brand new, and a store employee will be able to tell you exactly what is wrong with each one. Sometimes the scratches and dents can be easily fixed once you get your new washer home.

Features

If you want a washing machine with a lot of features, you are likely going to pay more. Front loading washers and those with higher capacities are becoming very popular but can also be very expensive. To reduce your cost, only choose the washing machine features you absolutely need and do not get tricked into paying more for a feature that isn’t necessary or that you will likely not even use. Smart shopping is the best way to reduce the cost of a new washing machine.

Delivery and Installation

Some appliance stores offer free delivery and installation, while others charge for these services. Be sure to compare the service fees and prices of washing machines at several stores to find the best deal. If you are going to have the washer installed, it is best to let the store do it. Make sure that the washing machine you are buying is still affordable when you add in the cost of the installation and delivery.

If you are looking for ways to reduce the cost of a new washing machine, consider the tips above. Always compare prices and take advantage of in-store sales, clearance specials, and coupons. A new washing machine doesn’t have to be expensive to be good quality.

Keep Talk Local Bookmarked

If you need help picking out a new washing machine, or need one serviced, TalkLocal can be an amazing resource. We connect you with service professionals in your area quickly and absolutely for free.

Can I Stamp Concrete Myself?

Tuesday, July 2nd, 2013

Can I Stamp Concrete Myself? - Landscapers

If you want to create a sidewalk, patio, or concrete walkway, you may want to add a decorative touch. You can do this by painting it or even stamping the concrete.

Many people wonder: Can I stamp concrete myself? The answer is yes, you can as long as you have the right supplies and the proper technique. Stamping concrete yourself will allow you to save money and feel a sense of accomplishment.

How To Stamp Your Own Concrete

1. Pour the concrete as you normally would. Make sure you do not let it dry completely.

2. Add a powder release agent to the top of your newly poured concrete. The release agent will prevent the stamps from sticking to the concrete after it has dried.

3. Place the stamping mat on top of the concrete and leave it in place until the concrete is dry. Tamp it gently to ensure the stamp is deep enough to create indentations. Make sure you place the stamp exactly how you want it, and ensure that all of the lines and edges are matched up properly.

4. Move the stamp mats around on the concrete if necessary to cover the entire surface and complete the stamp.

5. Allow the concrete to dry overnight and spray off the release agent.

6. Check that the stamp worked, and add sealant to ensure that the stamp stays and the concrete does not get destroyed as a result of bad weather or daily use.

If you have ever wondered: Can I stamp concrete myself? now you know that you can. It is actually a fairly simple process that only requires a few tools, a couple of hours and a lot of patience.

Once you have finished stamping your own concrete, you can enjoy it as often as desired and show it off to your friends, family members, and guests.

Professionals Can Do The Job, Too

If you want a professional to take on this task for you, start the project off by visiting TalkLocal. We aid you in the search process by connecting you with local specialists who can carry out the job. We give you three options so you can decide which works best for you.

Storage Facility Restrictions

Tuesday, July 2nd, 2013

Storage Facility Restrictions - Moving and Storage

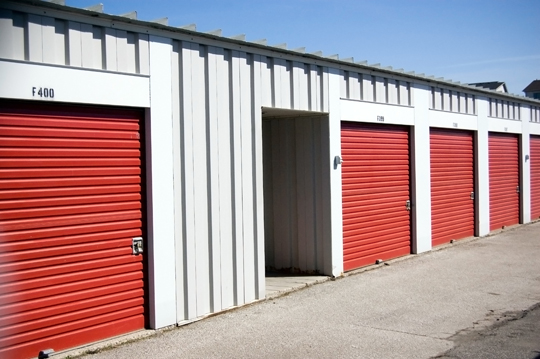
If you are considering using a storage facility to store your unwanted or unneeded items, think about some of the common storage facility restrictions. You don’t want to purchase a storage facility and learn later that you can’t use it for its intended purpose.

While most restrictions vary by facility, many are the same. If you want to make sure you get your deposit back and are not locked out of your storage building, you need to follow the rules of each facility. Here are some of the most common ones.

Items Which Cannot Be Stored

Most storage facilities have a list of items which cannot be stored in them. Some lists include items which cannot be stored inside or cannot be stored outside. Be sure to read the list carefully so you do not accidentally store something which is prohibited. Common items include flammable and hazardous items, chemicals, and paints.

No Living Things

Most storage facilities make it very clear that there are to be no living things stored inside the units. This may seem like a silly rule, but you may be surprised to find out how many people actually try to live in their storage building or keep pets and animals inside them. This is illegal in most locations and against the facility policies.

Insurance

One of the most common storage facility restrictions that many people do not consider is insurance. If you are planning to store a boat, camper, car, or another large or expensive item in a storage unit, you need to make sure it has proper registration and insurance.

Many storage facilities will recommend these things while others will require them. If a facility finds out you are not following this rule, they can make you remove your items regardless of how much you have paid towards your storage bill.

Finding The Right Storage Facility Is Easy

If you need to find a general storage facility, or even one to store specific items, TalkLocal can lend a hand. Log on to our site and give us a little bit of information about what you are looking for. We take care of the rest.

We will have three local companies call you to offer their services. You get to choose the right one for you. All of this is free.

Barbecue Pit Maintenance

Tuesday, July 2nd, 2013

Barbecue Pit Maintenance - Handyman

Summer is practically synonymous with barbecue. During this time of year, if you step outside, you’re sure to be greeted with the divine aroma of grilled food. Fortunately, having your personal barbecue pit means that you don’t have to play the role of the hungry bystander. You can cook up plenty of your own delicious chow. However, in order to get the most out of your barbecue pit, you need to know how to care for it. Here’s how to perform proper barbecue pit maintenance.

Seasoning Your Barbecue Pit

The most important aspect of caring for your barbecue pit is seasoning it with oil, especially if it’s new. This closes off the pores of the metal, preventing moisture and corrosive substances from causing rust. There are spray-on oils made specially for this purpose, making it fast and simple. However, most expert barbecuers recommend using bottled cooking oil because it does a better job. Using a large paint brush, slather the oil all over your barbecue pit. After using it a few times, the oil will dry into a protective coating.

Painting Your Barbecue Pit

Over time, heat, compounds from smoke, and exposure to the elements can wear away the paint on your pit, which promotes rust. Any metal surfaces inside your barbecue pit should be generously coated with a heat-resistant paint rated for temperatures between 800 and 1,000 degrees. However, while this will protect your pit for a time, it will eventually start chipping away again. Therefore, it needs to be reapplied or touched up periodically. This is a normal occurrence, especially if you leave your pit exposed. Using a grill cover can help slow the process. You can find a suitable cover anywhere that sells grills and grill accessories.

Keep It Clean

You should always make sure to clean out your pit after using it. Leaving burned wood, ashes, and grease buildup can ruin food’s flavor, promote rust and make your pit look ugly. Also, remove any rust with a fine wire brush, then touch up the area with barbecue paint in order to prevent further corrosion. If your pit is in desperate need of cleaning or repair, hand this tough job off to someone who has the proper tools and experience.

Use TalkLocal to find a reputable handyman near you. We will connect you with up to three professionals in your area who will be able to help you when you need them.