Archive for the ‘Computer Repair’ Category


Web Pages Will Not Load

Sunday, January 27th, 2013

Web Pages Will Not Load - Computer Repair

So you’re surfing along through the internet, jumping from website to website, and suddenly your web pages will not load. This is a frustrating situation to be in, so here are a few things you can do to try to get back to your favorites websites.

Check Your Internet Connection

Your internet connection should be the first thing you check for this problem. A router (the device that connects you to the internet) in your place may have been turned off, disabling the internet. Or your dog/cat has knocked/disconnected an internet cable/antenna – most likely, this problem will be easy to fix.

Other Possible Causes

Is it only a specific web page that is not loading up? Try going to another web page like Google. If Google loads up but not that specific web page you are trying to get to, chances are that the “specific website you are trying to get to” is experiencing a downtime – in other words, the website has been taken down temporarily.

Why does this happen? A website can be taken down for different reasons, such as updating the website. Information on the website or the website itself needs to be updated every now and then. It could be that the hosting provider for the website (the company that maintains the domain name on the internet) is experiencing a downtime. Or it may be that the website (the company that the website belongs to) is now out of business.

If you find that you cannot access other websites like Google, chances are that your own internet connection is at fault. Do you use a wired connection (a LAN cable) or a wireless connection for the internet? If you use a wired connection, check to see that the two ends of the cable is connected properly and the router is turned on.

If you are using a wireless network, you can find on the bottom-right corner of your screen that you are not connected to any wireless networks. Click on the bars icon to look for available wireless connections around your area and connect to the one you are familiar with. If the connection is encrypted, input the password to gain access to the network.

Once you are connected to a network using a cable or wireless connection, wait for a while for the connection to take effect into your computer and try connecting to the desired web page(s) again. If you are still having a problem, the possible cause may be bad hardware in the computer, cable, or router, which may require the help of a professional.

Additional Help

Hopefully this guide has helped you find your problem. If not, TalkLocal will connect you with up to three local computer technicians who are available to help you when you need them.

Norton Slowing Down Computer

Sunday, January 27th, 2013

Norton Slowing Down Computer - Computer Repair

Norton Slowing Down Computer?

Norton is a security system that protects your computer and information from viruses and other harmful third parties. However in some cases, Norton can slow down your computer.

Solutions:

1. Download the latest Norton Antivirus program update. Install the updates and restart your computer.

2. Make sure the performance options for operating system are set to applications or programs instead of background services.

Follow these steps:

Windows 2000:

3a. Click Start > Settings > Control Panel > Administrative Tools and then click Computer Management.

3b. In the left screen, right-click “Computer Management (Local) and then click Properties.

3c. Click the Advanced tab and then click the Performance Options button.

3d. Check Applications and then click OK.

Windows XP:

3. Unregister and re-register the auto-protect service.

Follow these steps:

Exit all open programs.

1. Click Start, and then click Run. The Run dialog box appears.

2. Type the following and press Enter:

"C:\Program Files\Norton AntiVirus\navapsvc.exe" /unregserver

3.  Click Start > Run. The Run dialog box appears.

4. Type the following, and then press Enter:

"c:\Program Files\Norton AntiVirus\navapsvc.exe" /service

5.  Close the Services program.

6.  Open Norton Anti-Virus.

7.  Click Options, and then click Auto-Protect.

8.  In the right screen, click “Enable Auto-Protect (Recommended)” and “Start Auto-Protect when Windows starts up,” and then click OK.

9.  Restart the computer.

Additional Help

If you continue to have problems with Norton slowing down your computer, try TalkLocal. We will connect you with up to three professional computer technicians in your area who will be available to help you when you need them.

No Internet in Safe Mode With Networking

Saturday, January 26th, 2013

No Internet in Safe Mode with Networking - Computer Repair

Windows “safe mode” is a way to allow users to access certain troubleshooting programs and features of their computer without activating the rest of the operating system.  It is often used for computer maintenance and debugging procedures.  When booting in safe mode, only the minimum necessary features are enabled, in order to better isolate problem areas.  The average computer user may need to use the safe mode to install or modify their antivirus programs, or to try and get rid of a virus on their system.  If you have no internet in safe mode with networking, perhaps because you want to download and install antivirus software, there are a couple things you can try to fix your connection.

Things You Can Try

– Make sure that you are booting up “safe mode with networking,” and not just the normal “safe mode.”  Safe mode with networking differs from the default safe mode in that your operating system loads some additional drivers and features necessary to connect to networks that are not loaded in the default.

– If you still have no internet in safe mode with networking, it might be because you are trying to connect to a wireless network, which is typically not possible while in safe mode.  Safe mode, even with networking, does not initially load wireless card drivers and therefore cannot be used to connect to a wireless network.  If you are using Windows Vista or Windows 7, there is an option to turn on wireless drivers while in safe mode.  Follow the steps outlined here to enable this option.  If you are using Windows XP, or a previous version, you will need to connect with an Ethernet cable in order to access the internet while in safe mode.

Additional Help

If you are connected through an Ethernet cable and are still have no internet in safe mode with networking, there might be something wrong with your system, your hardware, or your internet connection itself.  Check to see if your internet is working on other computers on the network.  If it is functioning normally then it might be time to call in a professional computer technician to take a look at your computer.  You can use TalkLocal to find a quality professional technicians in your area.  All you need to do is enter your name, contact info, and a short description of your problem and TalkLocal will automatically connect you with someone who can help in just a few minutes.

bootmgr is Missing on HP Laptop

Saturday, January 26th, 2013

bootmgr is Missing on HP Laptop - Computer Repair

Everyone hates it when they get an error on their computer.  It means that something is wrong but you probably have no idea how to fix it.  It’s basically the computer’s way of laughing at you.  A common error that some HP users have is a pop up saying that the bootmgr is missing. Not many know how to fix this but that are indeed a few ways.

How to ‘Find’ the bootmgr

Some people complain that this problem began to occur after they hit the F11 key.  The best way to help solve this is to:

1. Re-install the operating system. In order to reboot your computer with the newly installed system you must have your BIOS settings configured correctly.

2. While the computer is restarting you should continuously hit F1, F2, F10, esc, or delete in order to get to BIOS.  After re-installing the operating system the problem should be fixed.

If you want to try to restart the computer and not have to re-install the system you can enter the system recovery process upon reboot.  The recovery disc should be inserted and the program will walk you through the steps.  Be sure to read everything when do this because the recovered computer will be a direct result of your steps.

Either of these options are viable choices to take when trying to solve this error.  If you do have this problem or even if you don’t you should make sure the back up all of you files in order to make sure that you don’t lose any information.

Additional Help

If you follow these steps and still your bootmgr is missing, it may be necessary to seek a professional opinion. The easiest way to do this would be to go to TalkLocal, type in your problem, availability, and requirements and let us do the work. TalkLocal will find you up to three technicians in the area that will be able to help you.

Email is Stuck in Outbox Outlook 2010

Thursday, January 24th, 2013

Email is Stuck in Outbox Outlook 2010 - Computer Repair

Microsoft Outlook is a useful tool for email organization and synchronization.  Unfortunately, sometimes it has some problems.  One frequent problem occurs when users think they have sent an email, but it turns out that the email is stuck in outbox waiting to be sent.  This article contains a few ideas about what might be causing this problem and what you can do to fix it.

Why the Email is Stuck in Outbox

Additional Help

If you try these tips and you are still struggling with your Outlook, or if you have any other problems related to Outlook or your computer in general, visit TalkLocal. We will find you up to three local computer repair professionals and have them call you back within minutes.

Dell Laptop DVD Drive Keeps Opening

Thursday, January 24th, 2013

Dell Laptop DVD Drive Keeps Opening - Computer Repair

Dell laptop DVD drives do not stay closed sometimes. It only closes if the CD drive is in use, and when the CD tray is empty it keeps opening. Or, the DVD tray keeps ejecting when it is empty or in use. Keep reading if your dell laptop DVD drive keeps opening. This issue could be due to either a software or a hardware malfunction.

Software Problem

Scan your computer for viruses or run a diagnostics test on your computer. Sometimes, there could be a glitch in the software that keeps commanding the DVD tray to eject. Eliminating any potential viruses by scanning your computer with a trusted virus scanner could fix the issue.

Hardware Problem

The problem could be the electronic circuit board, which can be easily replaced for a low cost. It is not recommended that you tamper with your computer’s circuit board if you are not an expert in computer hardware.

It can also be caused by a faulty connection to the DVD drive, in which case you can remove the data cables and power cables that are connected to the drive and then plug them in again.

Additional Help

In the worst case scenario, your tray sensor might not be functioning properly. In this case, it may be best if you call a technician to help you replace it. TalkLocal can help connect you to up to three professionals in your area, who can help you when you need them.

My Headphone Jack Broke Inside My Laptop

Wednesday, January 23rd, 2013

My Headphone Jack Broke Inside My Laptop - Computer Repair

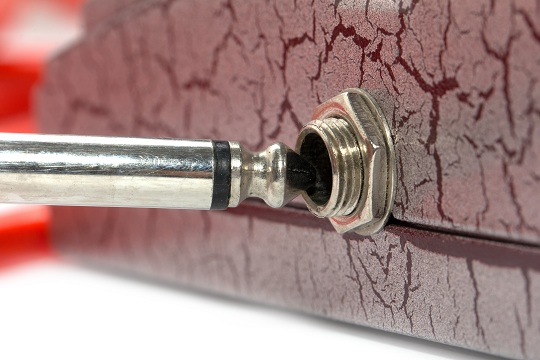
My headphone jack broke inside my laptop once. Here are some recommendations for dealing with this frustrating issue.

Home Remedies (Not Recommended in General)

Pliers: Strongly Not Recommended

Your first instinct may be to try to pull out the broken jack with the thinnest pliers you can get your hands on. However this is strongly discouraged. Headphone jacks are designed to “lock on” to the place linearly, requiring non-angular and extensive force for it to be dislodged from the laptop.

With the very limited space that you have to lever the pliers through, the work of dislodging the broken jack is almost impossible. Using the pliers will also almost certainly damage your computer.

There is a chance that a jeweler or a watchmaker may be able to help you with their precision tools, but don’t count on them helping you out – their tools are not exactly designed for pulling off broken jacks, and the tools may become damaged.

Glue: Not Recommended, but Can Be Effective

Do not try to douse the adhesive directly onto the broken jack. Instead apply the glue to the end of the stick and let it dry for a bit first – this is to lessen the fluidity of the glue while keeping its adhesiveness.

After the glue dries for a bit at the end of the stick and becomes firm, carefully attach the stick’s glued end to the broken jack, find something to hold it in place until it dries, and pull the stick in hopes of getting the jack out.

Although this step has been proven to be successful, it is generally not recommended – one wrong move and your computer may be permanently damaged. Exercise your own discretion. If it is a cheap laptop you plan on throwing away after a bit, use home remedies. If not, consider getting help from a professional.

Help from a Professional: Highly Recommended

Home remedies can work, but always at a risk of damaging your computer. If you are willing to spend a few bucks to ensure everything works smoothly, hire a professional to help you. TalkLocal will connect you with up to three local professionals who can help you when you need it.

Stop Your Neighbor from Using Your Wireless Network

Wednesday, January 23rd, 2013

How to Stop Your Neighbor from Using Your Wireless Network - Computer Repair

The fact that someone else is tapping into your wireless network can pose a serious problem. Your neighbor not only has the capacity to slow your internet connection by stealing bandwidth, but even possess the potential to steal your passwords if you are using an insecure network. Here are some tips to stop your neighbor from using your wireless network.

Change Your Wireless Router Settings

You have the capacity to set the list of trusted “MAC” addresses that can connect to your router and get into your wireless network. MAC addresses are unique addresses possessed by every network card used to connect to the internet.

Once you set the list, any other network card that is not listed will be blocked from joining the network. Follow the steps in this guide on how to set the list of MAC addresses:

The steps may differ depending on the kind of router you have, but these are general. You will need to know the IP address of your wireless router as well as how to find the MAC addresses of the network cards that you own/approve on your network.

Your Router’s IP Address

This is the default IP address. Although it may differ depending on the type of router you have, it is typically for most networks.

How to check the MAC address of a network adapter

1. Click on the Windows Start Button.

2. On the “search programs and files” bar, put “Run” and press enter.

3. A small screen should come up. Type “cmd” and press enter to open command.

4. Type “ipconfig /all” to list your network card information.

5. Locate your Physical Address. This is your MAC address.

How to Set the List of MAC addresses on your Router

1. Open any web browser and enter the IP address of your wireless router.

2. A Login window should appear. Login using your administrator account.

3. Click on Advanced Settings.

4. Click on MAC address Filter/Filtering.

5. Configure the list of MAC addresses to fit your intentions.

6. Save your settings.

You can find more specific directions depending on your type of router at this link:

http://wintelguy.com/2010/20101024_mac_filter.html

Additional Help

Seek help from a professional if the above recommendations do not resolve the issue.

TalkLocal can help with finding the correct local expert to fix your issue quickly, which saves you time and energy in a stressful situation.

Gateway Touchpad Replacement

Tuesday, January 22nd, 2013

Gateway Touchpad Replacement - Computer Repair

Since Gateway touchpads are delicate items, misuse of the touchpad or even just normal wear and tear can cause the touchpad to malfunction. For some people, it may be easier just to replace the Gateway touchpad rather than the whole computer. Warning: The process of replacing the touchpad is somewhat complicated, and you should be very careful in handling laptop parts. If you feel uncomfortable at any point during your Gateway touchpad replacement, TalkLocal can connect you to a trained IT professional to help you with this task.

Disassembling Your Laptop:

At this point, you need to remove the LCD display by disconnecting the four screws beneath the display and then remove four more screws near the center of the top cover. This will allow you to disconnect the blue and white cable connecting the touchpad to the motherboard. You now should be able to pull the top cover off the motherboard and replace it with your new touchpad. Ensure that you reassemble the laptop in the same way it was disassembled.

Once again, if you feel the least bit uncomfortable disassembling and reassembling your laptop, visit TalkLocal right now to find you a local computer repair professional to assist you within minutes. We will connect you with up to three local professionals who will be able to help you.

System CMOS Checksum Error

Tuesday, January 22nd, 2013

System CMOS Checksum Error - Computer Repair

There are many errors you can get while starting up a computer.  One of the more common errors you might encounter is the infamous System CMOS checksum error.  However, while this error might be extremely frustrating, there are fortunately only a couple of problems that can cause this error, all of which are easily solved.

What does this error mean?

A checksum is a value stored in the CMOS memory in order to guard your computer’s BIOS software. Every time you boot up your computer, the current value is checked against the stored value to detect whether or not the BIOS was changed. If these two values are the same, the computer boots normally. However, when these two values differ, the system flags it as a CMOS Checksum error.

What can cause this error?

There are usually 3 main reasons for the System CMOS checksum bad error:

How can I fix this error?

If a user or virus updated the BIOS:

At boot, go into the BIOS screen by pressing del or F2 or the specific key combination designated by the motherboard (it should be displayed on the boot screen). Reset the BIOS settings back to default while checking that the date and time are correct. Afterwards, make sure to run a virus scan to ensure that a virus didn’t cause the error and the BIOS settings are still correct.

If the CMOS battery expired or isn’t functioning:

If you suspect this is the error, the battery can be easily changed. Before actually making any hardware changes, reboot the computer to ensure that the error still exists. Make sure to write down all the CMOS settings (if you lose them, you can obtain them from your computer manufacturer). Using the motherboard’s tech manual, locate the battery and remove it. Afterwards, replace it with a new battery with the same specifications (voltage and size) and reenter the CMOS settings.

If the computer was not shut down properly:

Make sure the computer shuts down completely before turning off the main power by going to the Start Menu and clicking Shut Down.

At any point, if you ever feel uncomfortable working with your computer or would rather have a trained IT professional do the repairs, you can always use TalkLocal to find a computer technician right now! We’ll connect you with up to three technicians in your area who can help you when you need it.